Categories
Home Automation Smart Home WiFI Z Wave Zigbee

Smart Home Series – The Technologies

Continuing our Smart Home Series, I want to talk about the Technologies that are used in these smart home devices. As we continue towards the maturity of home automation we are seeing alot of the same products being release but using differing technologies.

There are currently 4 main technologies being used today. Those are ZigzBee, ZWave, WiFi, and Bluetooth. You may have heard of some of them before. I am sure you have heard of WiFi and Bluetooth as they are used in everyday life.

My goal here is to break down the pros and cons of each technology to give you a better idea of what is out on the market. Now lets dig a litte deeper into each of these to learn which product or products will be best for your home.

WiFi

Lets start off with the most recognizable and versitile technologies in use today. WiFi is commonly used in Computers, tablets, and cell phones is available almost anywhere you go. It would make sense that WiFi would eventually show up in the home automation space. Lets not forget that WiFi smart devices are usually $10 to $20 cheaper than their ZigBee/Zwave Counter parts.

WiFi Pros and Cons

Pros

  • Easy to pair to network
  • Easy to use
  • Uses existing wireless network
  • Lower cost of devices
  • does not require a smart hub

Cons

  • Uses older Wifi Technology (2.4 Ghz 802.11 BG)
  • Security concerns with using older technology
  • Using older and slower WiFi can cause performance issues on your network
  • Range can vary depending on your network and other variables
  • Dependent upon internet connectivity for management

Bluetooth

Bluetooth is used in the Smart home space, it is usually paired with some other technology to allow for remote managment. For instance many smart locks such as August Smart Locks use Bluetooth due to it’s short range. This means you are expected to be very close to the lock to be able to unlock it from your mobile device. If you want to integrate it with the rest of your smart home you will need to get a WiFi bridge kit which will connect to your WiFi and accept commands from the internet and send them to your lock via Bluetooth.

Bluetooth Pros and Cons

Pros

  • Short range means that it is less likely to be snooped on
  • Hub is not required, you can just use your phone.

Cons

  • Bluetooth is not the most secure technology
  • If you break or lose you phone you are sunk
  • You need to be right on top of the device to use it
  • Dependent on other technology for Smart Home integration

ZigBee/ZWave

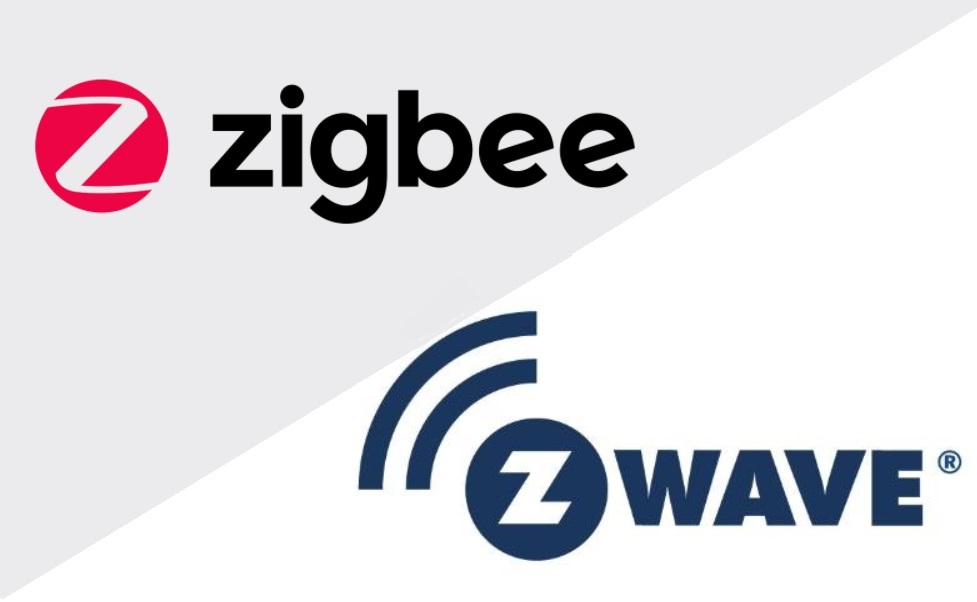
For the purpose of this article I am going to combine ZigBee and ZWave to the same section. Although they are two different technologies they are very similar in their form an behavior. The one thing that differentiates them the most is that ZWave operates on the 800-900 Mhz frequency range which is similar to some “older” wireless house phones. Meaning this could interfere with phone calls or vice versa. ZigBee on the other hand operates on the 2.4 Ghz frequency which can impact “older” WiFi networks and could also be impacted by microwave ovens.

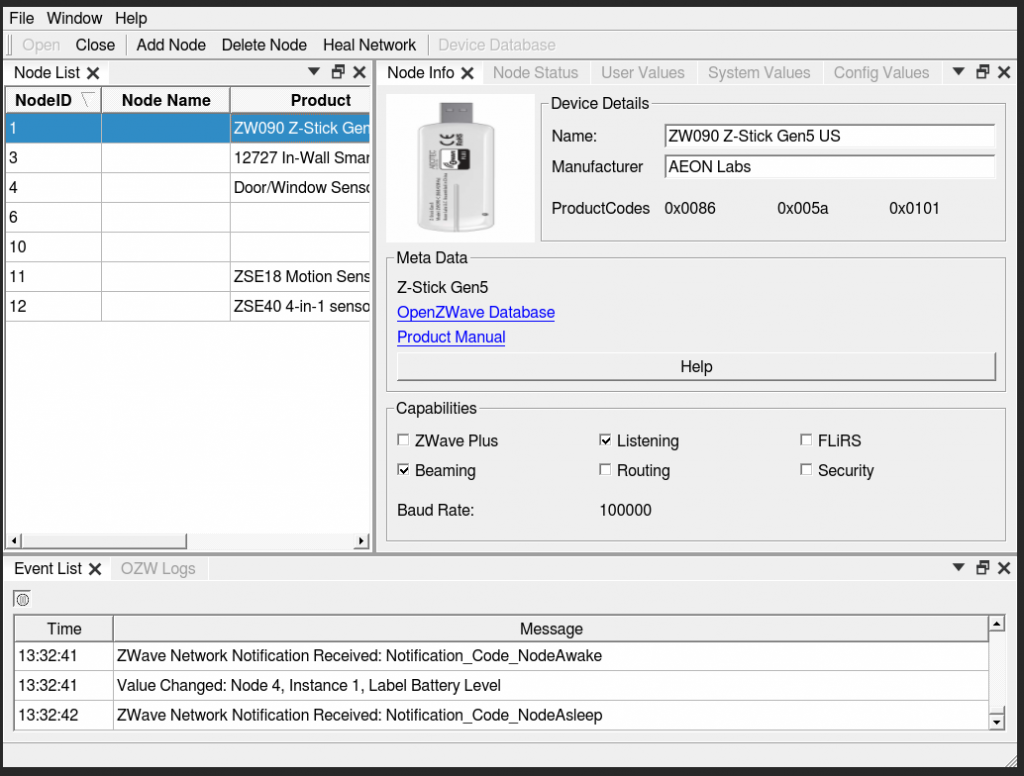
I would also like to point out that both ZigBee and ZWave require a Smart Hub to work. The Smart hub can be anything from a simple USB stick (Aeotec ZStick, or Sonoff ZigBee 3.0 USB Stick) to an appliance hub (SmartThings, Hubitat, or Aeotec).

ZigBee and ZWave also treat their devices as routers and endpoint (ZWave calls it something else, but its very similar) on a network. However as seen below in the table, ZigBee is only effective up to 11 meters of open space. In order to resolve that issue both technologies encorporate the idea of hops from the hub to the devices. Meaning the Hub will connect to the closest router and that router will forward the command to the next device. There are limits to how many hops are supported and each technology is different.

Another thing to note is that both technologies employ low power devices that can run on battery for ~1 Year. These devices do not route traffic as the power requirements for that would drain the battery too quick.

ZigBee/ZWave Pros and Cons

Pros

  • Independent of network connectivity.
  • Security improving with each new version.
  • Able to create a vast network of IoT devices.
  • Routing is automatic and dynamic.
  • Battery powered devices are an option.
  • Plenty of options to manage it with Open Source and Consumer products available

Cons

  • Price – Costs more than Wifi Counterpart
  • Can be difficult to configure for beginners
  • Can interfere with Wifi and other wireless devices in your home
  • Limited range (as seen below)

Additional Information

As mentioned above, here is a comparison chart of the different technologies that we talked about and their effective ranges. Please note that these values are open space with no walls or other interference.

Categories
Home Assistant Home Automation Smart Home WiFI Z Wave Zigbee

Smart Home Series – It’s been a long road

Introduction

From the time that I started this blog I always wanted to use it as an education tool for people looking at getting into home automation. That is why I am going to start this smart home series, starting with the basics.

For the past 3 months I have been working add and upgrade my home automation setup in my home. I think that now is the time that I am ready to start sharing what I have learned.

I try not to broadcast to the world that I am into home automation as for the most part people either don’t care or don’t know what it is. My wife however likes to tell everyone how complicated I have made things in our house due to my “tinkering”.

Home Automation is a vast subject and as time goes on it keeps getting bigger. New products and features are constantly being added to the market and it is very easy for consumers to get overwhelmed or make the wrong choices. Vendor lock-in and a lack of presence in retail stores makes it difficult for people to understand all of the subtle nuances of Home Automation. Another problem in the home automation market has always been the price.

Cost

Lets address the biggest elephant in the room when it comes to home automation, the price. The reason for the high cost of entry and additions for home automation is simple. Home Automation is an enthusiast market and they know that people who want to do these things will pay the price. Some people will say that the COVID-19 pandemic and chip shortage had something to do with it, but from having done this for about a decade, it was never cheap or even affordable.

There are opportunities out there to find reasonable deals on smart home devices, but those deals are not always what they seem.

Vendor Lock-in

Another issue that I have seen is vendors who say that they work well with others, but in reality they are not. I must admit that within the last 5 or so years vendors have gotten better about their interoperability with other vendors, but that has not always been the case. When I first started “playing” with home automation I started off with a Nexia Home router. My wife and got me a starter kit when I first started looking into Home Automation and I thought it was the greatest thing ever. It operated using Z-Wave and could control a single plugin switch that you could used to plug a lamp or something into. If you don’t know what Z-Wave is don’t worry I will be doing a post about that soon.

The problem came when I went to purchase another device and pair it to the hub. I looked on their website and nothing was less than $60 for a room sensor. On top of that they wanted to charge me monthly per device to have it connect to a Hub in my own house! On top of that I went out and found another Z-Wave certified device and tried to pair it and it would not. Then I tried to take the Nexia Z-Wave Certified device and tried to pair it to something else and that didn’t work either. Needless to say, the hub and outlet has been sitting in a box.

Installation Issues

When I first got into home automation there were only a very few players in the space. As I mentioned above this lead to higher pricing, poor support (documentation), and installations were jankie at best. If you wanted to make your lamp “smart” there were no such things as a smart lightbulb or an in-wall outlet. Your only options were having an external “smart” socket or cut your power cord and put in an inline smart relay.

Also when smart light switches started to be released they were large and bulky, which made them difficult or impossible to install in older home junction boxes. Also they required a Neutral line to the device to provide a constant flow of power to the device. This can also cause a problem with people in older houses making home automation next to impossible.

Things are getting better

Flash forward a few years and IKEA came out with their TRADFRI smart home devices that required their own hub to operate. After doing some searching online I discovered that the TRADFRI lightbulbs could be reprogrammed and with a little scripting and access to the Smartthings developer console, you could get it to work with the Samsung Smartthings Hub!

As of the writing of this article, I have since retired the IKEA TRADFRI hub (it died, RIP) and my Samsung Smartthings Hub in favor of running my own smart up with a Raspberry Pi and a Z-Stick for ZWAVE and a Sonoff USB stick for Zigbee. With it I can connect almost any device without additional programming.

As home automation and smart home devices are maturing there have been massive improvement in the number of vendors creating new and exciting products all the time such as smart light bulbs, LED strips, thermostats, motion sensors,, door locks and smart egg cartons. Switches are getting smaller and thinner and no longer requiring a neutral wire opening up a whole new world of possiblilites.

Having more vendors in the space has also caused a bit of a bidding war for customers. This is great news for consumers as that means prices are starting to drop. Also with more vendors in the space jockying for position they are also creating products using different technology (Wifi, Zigbee, and ZWAVE). This means as long as you are using a vendor agnostic controller (Home Assistant, OpenHAB, etc) , you have a world of options at your fingertips.

I am going to end this post here, but I plan on doing a deeper dive into home automation and the different technology options available to help those you are interested in making an informed decision.

Categories
Home Assistant Home Automation Z Wave

Inovelli Smart Bulbs

While I was in the planning phases of my blog move I wanted to find new sources of content for the blog. As I was shopping on Amazon for ZWave sensors I came across this company called Inovelli. I had never heard of them before and I kind of dismissed them and went on my way. But after a while I figured I would check them out.

Inovelli is a US based company and they make all their own products even down to the firmware. For my test of their products I decided to order 2 smart bulbs (one is being and open box and discontinued as the other one is their brand new Ilumin Bulb) since I had just purchased the Merkury Wifi Smart Bulb from Walmart and I was not unfamiliar with smart bulbs.

The packaging was not very impressive, in fact it was a little hard to figure out which was the open box and which was brand new aside from the label on the box. The bulbs were just rattling around in the box and were a little difficult to get out. That aside I am pretty impressed with the product.

The setup was pretty simple (after you read the instructions) and once the device was paired and I rebooted my Z Wave Controller it showed up immediately. They also work great with Home Assistant just an FYI there. The lights were bright and very responsive.

My Usage for these bulbs

You might be asking, Why do you want/need a ZWave smart bulb when you can get a smart switch? For me I am using one of these bulbs for a 2 fold purpose. The first being I have a pull chain light switch in my utility room in my basement and I don’t want to have to go through the trouble of setting up a smart switch. and secondly, as they are connected to power 100% of the time, and they actually will act as a ZWave extender/repeater (which I can go into at a later time) to expand my network.

I think if you are in need of a smart bulb and already have an existing Z Wave network you should really look into these Inovelli Smart Bulbs. I really regret not purchasing their colored bulb which I hope to purchase soon and have a review up for it soon.

Categories
Home Assistant Home Automation Z Wave

UPDATE!! Home Assistant: Open Z Wave Add-in 0.5.0 not working

So I just ran into this issue with my Home Assistant Setup. I logged in for the first time in about a week and found that I had an update available for the Open Z Wave Add-On. Oddly enough the check box that says Auto Update does nothing.

Anyway so I updated thinking everything would be okay….. WRONG!!!

After doing the upgrade and rebooting the appliance the Open Z Wave admin console would fail to load and the service would not start. I tried several times as that is normally what I have to do. Which by the way the the start on boot up also never works.

I checked the Home Assistant forums and found this thread. It turns out that the the issue is actually with MQTT. Apparently MQTT is presenting an invalid response which is causing Open Z Wave to barf. One of the options listed was to use an MQTT Browser to delete the entry and that has worked for some people to varying levels of success.

It did not work for me, but here is what I did:

  • Back up your configurations before you do any of this.
  • Step 1: Uninstall Open Z Wave from Supervisor > Add-ons
  • Step 2: Uninstall MQTT
  • Step 3: Reboot Home Assistant hardware
  • Step 4: Install MQTT again and make sure it is configured and then Start the services.
  • Step 5: Install Open Z Wave and make sure it is pointing to the correct ZWave Antenna and start service.

I then checked the Z Wave log to make sure the error was gone (and it was!!)

UPDATE!! Within about an hour of making this post I discovered that my whole Zwave setup was not working and the service eventually crashed. This morning I ended up doing a fresh install and I was able to pull down OpenZwave 0.5.1 and that seems to be working. I will update once I have more information.

I hope you found this post helpful, and if so please share with your friends.

Categories
Home Automation Z Wave

Exciting News!!

As I mentioned on the home page we are now an official reseller for a ZWave vendor! That means we are able to sell directly to our clients rather than having them go through an external reseller.

We look forward to serving you soon!

Categories
Home Assistant Home Automation Z Wave

Home Assistant Build out continued… Setting up Automation

I believe we left off last time with all of my Z Wave devices finally showing up after being patient. Now it is time to setup my favorite (also the first I ever did) which is to turn on my office lights when the door opens. It’s like a surprise party every time I go into the office (Okay I stole that from Jerry Seinfeld). For this post I will do a step by step guide.

For this guide we will start from the Configuration Menu. Just an FYI there are in fact multiple ways to setup an automation with this new version of HASSIO. The way we are going to proceed is the classic way of setting it up which is Configuration Menu > Automation. However if you are the devices menu looking at a device you will actually see all the automations attached to that device. This is an awesome feature I am so excited that it is available.

Anyway, on to the guide.

From the configuration menu click Automation

On the Automation page you will be shown a mostly blank page, with a little plus icon in the lower right hand corner. Click on the icon and proceed to the to setup wizard.

Home Assistant New Rule Button
New Rule Button

Once you click on the new rule button, it launched the new Automation Wizard

New Automation Wizard

From here you can follow the wizard and type in what the automation should do and then click Create Automation and it will walk through the process of creating the wizard, or you can be like me and kick it old school and just click SKIP.

You will then be presented with the blank automation form

Blank Automation Form

Now you will need to name your new Automation in my case I named mine Office Lights Turn On. From there you will need to move onto the Triggers section.

Specify the Device, in our case it is Door/Window Sensor and then what the triggering status would be. Then move down to Actions.

Here we will specify the device which in our case is my GE in Wall light switch and the action which will be to turn it in.

Once you are done with all the configs you will need to click the Save icon in the lower right hand corner (you might need to go looking for it).

To recap the rule we just setup will set the in wall switch to ON when the door sensor is set to on. It is really that simple, and it makes your friend and family think that you are a wizard…. well maybe not but it’s still cool.

I hope you found this guide helpful and if you did please share with your friends.

Categories
Home Assistant Home Automation Z Wave

Home Assistant / HASSOS 2020 Build out

With all that has been going on in the world I decided with all my extra free time to get back into my Home Assistant setup and do some updates. There had been many changes and updates since the last time I looked at my system and let me tell you right off the bat, my system was running great. It had been up for about a year or so since the last catastrophic failure, which in my defense was due to my SD card becoming no longer readable. Before that my Home Assistant (that’s right not HASS.io) ran for like 3 years before this happened.

So I logged into my HASS.io setup and decided to start updating…. and that is where things went wrong. I tried to install OpenZWave which caused my zStick to stop working and my APIs for my smart thermostat and IKEA TRADFRI stopped working as well.

Needless to say I had to start from scratch so I downloaded the latest version of HASS.io and turned off my Raspberry Pi. Here is what I am working with for this setup:

  • Raspberry Pi 3 B+
  • 128 GB San Disk SD Card
  • Aeotec Z-Stick Gen 5

I loaded up my setup and fired up the Pi….. then I realized I forgot to configure my static networking for HASS.io. Fiddle sticks, So I hit the power button on my USB Dongle, popped the SD card back in my PC and made the Network changes (I can create a walk through for this later, or you can RTFM on the Home Assistant Website. Then I replaced the SD card again and fired up the Pi, and after 3 hours, nada. It didn’t work. ARGH!!!!

Apparently HASSOS (the OS for HASS.io) does not like it when you pull the power out while it is attempting to download files and databases. Go figure.

So I powered off the Pi and flashed the Card again and we were off to the races. FYI, I didn’t do the network config file this time either and it worked fine…. Thanks DHCP!

Once I got to the log in screen my first order of business was to get Open Z Wave running. I went to the Supervisor section of Home Assistant and added the Open Z Wave Add-on. What I didn’t realize was the fact that I needed to install MQTT before Turning on the Open Z Wave service. I can go into details on that in a later post as well but for now just know 2 things. First, once you turn on Open Z Wave for the first time it may take 2 or 3 tries for it to actually start and stay started. Even then it will take about 2 minutes for the service to load (depending on your hard ware). 2. Even if you click start on boot, it does not start on boot.

After all of that I finally got it to load as seen here:

Open Z Wave Dashboard

If I can give any first timers or even those who are used to the older Z Wave Interface any advice, it would be to be patient. It took about 12 hours for all of my Z Wave devices to finally report in.

Currently my Z Wave Devices are as follows

  • GE Z Wave Smart Switch (Gen 1)
  • Zooz Motion Sensor
  • Zooz 4 in 1 Sensor
  • Z Wave Door Sensor
  • Wave Door Sensor
  • GE Z Wave Smart Switch (Gen 2) (Not installed yet)

I am going to end this post here, but I plan to document my build out of Home Assistant and maybe even my VMware Home Lab where I might start to run Home Assistant on a VM!.