Okay, I think I have a plan…..

After some quick thinking and talking it over with my Family and my boss. I am going to upgrade my VCP 6.0 to a VCP 6.5 and then move forward with the VCAP 6.5.  As I already have a VCP 6.0 that is active I am eligible to take the Delta exam which I have done twice before.

More Information to come….

ARGH!!!! You have got to be kidding me here!

So I took the design class that I was registered for, only to find out on the first day of  training that I am not eligible to take the VCAP 6.5. Now I know I have been doing this for a while, but the last time I looked into it, you were able to upgrade to a higher tier cert on a newer version as long as you had an active VCP. Well it turns out that has been changed.

I will do a post in the coming days to talk about the class, and right now I need to regroup and figure out what I am going to do.

It’s Official!!!

I just received my digital books for VMware vSphere: Design Workshop [V6.5]! I am looking forward to taking this class next week

TCP Reverse Proxies, the next step in web hosting

So as I mentioned previously, I have been dealing with a DR issue at work. One of the services that we did not bring back due to networking issues is our IIS ARR server which was acting as a reverse proxy for several of our web services.

So there are many options out there which we can go with so but I would say that the front runners at this time are either NGINX or PFSense. Over the next few days I will go into more details with additional posts with more information.

How to install PowerCLI

Recently VMware has changed the way you install PowerCLI from being the standard MSI installer that we have all been used to for years, to downloading and installing it from the PowerShell Repository.

Here is the process for installing PowerCLI:

Open PowerShell by running it as an Administrator

Once PowerShell loads up you will want to change the Execution Policy to Remote Signed

Set-ExecutionPolicy RemoteSigned

Once that is done you can install PowerCLI by running this command:

Install-Module -Name VMware.PowerCLI -Scope CurrentUser

You will then be prompted at least twice to give your consent to download and install from an untrusted repository.

How to add Target Servers to vMA

I have had this one post sitting around for a while and I figured I should get it written before it gets lost.

Earlier I was working on getting vMA stood up in my lab environment and I figured that I should do a post about how to configure vMA to connect to a target. Adding a Target Server in vMA is a faster way for you to be able to issue commands. Rather than having to specify which server you want to run commands against (especially if you are running several commands on the same box) you should set the server as a target. In this instance I will run through the steps of setting a target for an AD Authenticated host or vCenter. 

From the vMA console you will type the following command out:

vifp addserver <vcenter server name.domain.local> –authpolicy adauth –username <AD DOMAINUserName>

and press Enter and you will be prompted for the Password of the AD account that you referenced.

To verify that the server is connected you can use the following command:
vifp listservers –long

This will tell you the server name as well as the method of authentication. Now anytime you want to run a command against that host you will be able to do so without having to re-authenticate every time.

To set your Target server you can use the following command prior to running your actual command or script.

vifptarget -s <servername>

VMWare Virtual Machine will not Start in vCenter

So I was asked by a client to do up “hardware upgrades” on one of their virtual machines. This VM is not production and is not running anything at the moment, but will soon become an SQL Server running an application. So I went and powered off the VM, logged into the C# vSphere client (they are running vSphere 6.0), and doubled the memory as requested by the client.

After making the change I went to power on the VM and I get presented with this pop up error message from VMWare

The message itself seems pretty generic but I have actually seen this one before. This error has to do with  an issue with the management agents on  your ESXi host.

I followed the instructions found on this KB article but it did not resolve my issue. I also found this KB article which might yield better results but as this whole environment is production, I will need to wait to test that.

WORK AROUND:

In order to get this VM powered back online, I needed to log directly into the virtual host and power on the machine.

The VM powered on with no issues.

I hope you find this helpful and I will update this when I have a solution.

My VCAP 6.5 Journey Begins!

Today at work I got the approval from my boss to schedule training to upgrade my VMware VCP 6.5 to the VCAP 6.5.
I am so excited that I can hardly sleep. Although my training does not start until September I plan on going full force at this before the class even starts. I am seen several blogs online and I will be reading them all to prepare.
I look forward to detailing my journey here so please stay tuned.

Airwatch on a Mac 003 – The rebuild

So when it comes to the world of Mac’s and Apple products in general I tend to steer clear of them as much as possible.
In my company however we have a few Mac users and supporting them can be challenging at times. That being said and after bricking this device on my first trip around the block, I got a pretty good view of how to reload the OS from the internet. For documentation purposes I ended up bricking the Macbook again just to see if I got the same results. You can find that post here.

After the wipe completed the Macbook reboots and you are presented with this Lock Screen. This is to prevent unwanted access if the device is lost or stolen. 

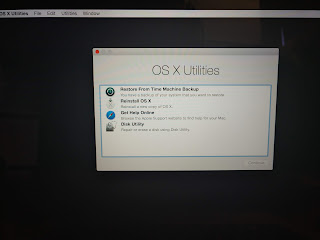
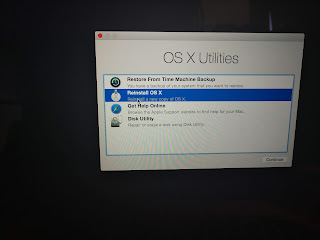
Type in the 6 digit pin number and click the arrow next to the last box to unlock the machine. You are then presented with the OS X Utilities screen.
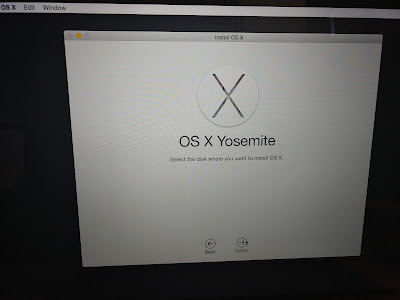
From here you have the option to restore from Time Machine Backup, Reinstall the OS, Get device help or go into disk utilities. I can tell you from personal experience, at this point if you go into reinstall OS you will find that the disk is not available as seen below. 
 you will need to Shut down the laptop, and restart it back up into recovery mode. 
  
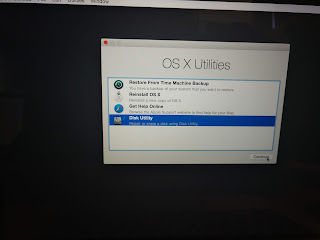
From here you will want to select disk utilities and click continue.
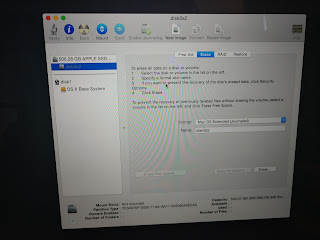
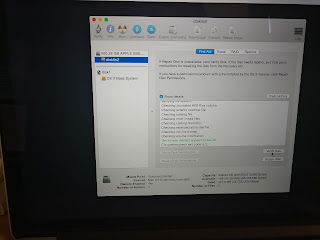
Once the Disk Utilities loads up you will see that the Drive is there and there is a volume available, however if you select the volume you cannot do anything with it. the options to inspect is are grayed out.  You will need to go to the Erase tab to continue.

On the Erase tab you have the ability to rename the volume, select the new formatting and then click Erase. After the volume has been reformatted you can then go back to the First Aid Tab.

you will see that the option to verify disk has been enabled and if you run it you will see something like this.

As long as you get this then I would say you are safe to proceed. Click the close button in the upper left hand side (looks like a red circle) and this will bring you back to the OS X Utilities Screen.

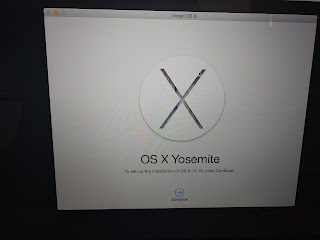
Now click on the Reinstall OS X and it will take you through the wizard to reinstall the OS. 
Click Continue

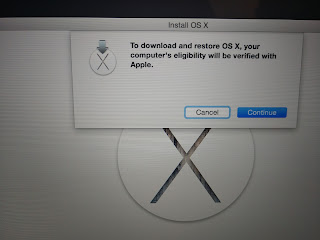
click Continue Again
Agree to the terms and conditions (does anyone read these)
Are you really sure you read them???
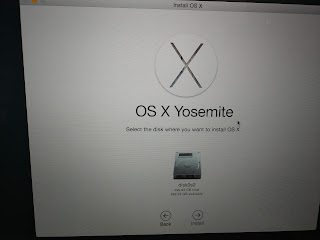
Hey look! there is a drive there now!!! Click on the image of the drive and then click Install.

I have worked in IT for more than 15 years, and I have seen all kinds imaging and deployment of operating systems but this was pretty cool.

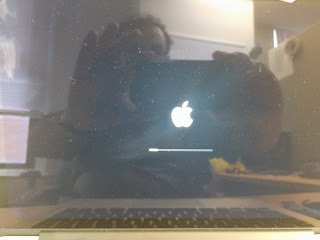
After you click install the laptop reboots with the Apple Loading Screen.

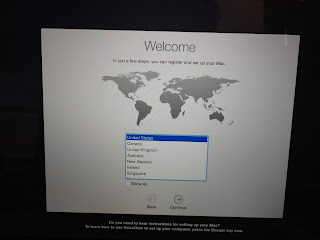
Then the OS actually gets installed, and after about 2 hours of downloading and installing we are back to the welcome screen as if it was fresh out of the box.

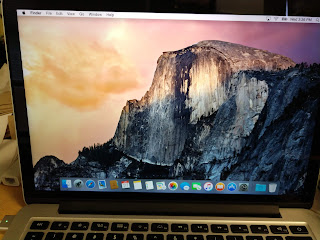
 Then after going through the setup wizard I am now back to the desktop.

I then reinstalled the Air Watch client which I will cover in a different post, connected it to my server, and it is now ready for action!

I hope you find this helpful. Please leave a comment if you do, I would love to hear from you. 

Airwatch on Mac 002 – Bricking the Macbook

In my previous post I mentioned about how Airwatch destroyed the OSX volume on my test Macbook Pro. Just encase you were wondering what steps I took to do this with Airwatch I have decided to document the process for you here.

First, while logged into Airwatch you will need to find the device you are looking to wipe.

Click on the device name to be brought to the details window.

 Click on more in the upper right hand corner and go to wipe device.

 Enter a description of why you are wiping the device and click continue.

Then enter and unlock pin. This is used to unlock the device after wiping it (encase the device has been lost or stolen) and then enter your security pin to authorize the device wipe. Once the pin number has been entered the signal is sent to the Macbook and the wipe begins almost immediately.
I will be documenting and posting the Resurrection of this Macbook Pro in a later post.