Categories
Virtualization Vmware

Unable to log into a new VCSA Appliance added to an SSO Domain

So today I ran into an interesting issue. I was adding a new VCSA appliance to an preexisting SSO domain for a post that will come out in the coming weeks and I discovered a few things.

First of all, I learned that there are not many blogs covering this so I figured I would make a post just encase I get hit with a brick and forget.

So I ran through the install of the new VCSA appliance and selected all the settings as you would normally do. However when the installation completed it said everything was fine and I should be able to log in at the new URL.

I opened the URL and tried to log in…. and It failed. This being the first time I have tried this I was not sure what to expect, and here is what I mean:

The Platform Services Controller (or PSC) is responsible for authentication to vSphere. That being said I figured I might be able to log in with my Domain credential…. I was wrong.

So I then tried logging in with the Administrator Credentials for the SSO Domain…. that too did not work.

I then logged into the vSphere Web Client for the First VCSA to see if I could see what is going on over there. It turns out, from an SSO Perspective, everything was running great. I went to see if I could reset the Administrator password and discovered that I must not have had enough coffee this morning. You see, because vSphere is based on some form of Linux Kernel, I forgot to take into account that THE USER NAME IS CASE SENSITIVE!!!!!

So I went back to the login screen and logged in with the correct credentials and IT WORKED!!

Now to figure out why AD Authentication was not working…..

Well it turns out that that lack of coffee I mentioned earlier came back to bite me yet again <face palm>

Although the SSO component was working and showed my AD domain as a valid and default authentication source, it doesn’t mean squat if the server is not a member of the Active Directory Domain. A quick add to AD and a reboot later and we were in business.

Lesson Learned:

1. Don’t skip out on Coffee
2. Linux based credentials are Case Sensitive
3. Drink more Coffee
4. Make sure that host is added to AD before you try to authenticate.

I hope you found this helpful and if I ever get around to it I will add screen shots for a more TL:DR experience.

Categories
Virtualization Vmware

Adding an IDE Storage Adapter for an OVF that is supposed to run in vSphere? What were you thinking???

A few weeks ago I had the misfortune of having to deal with a .OVF that was sent by a support team to one of our engineers so we can run a Virtual Machine in our lab environment.

That seems pretty cut and dry, except when I go to import the .OVF and I get this message when the import gets to the Validating Step.
I had never seen this message before, but after seeing the part of the message that says DiskControllerReference, I automatically assumed that there was an issue with the .VMX file on the VM. Well because this is not a VM, but an .OVF I decided to open the .OVF file in Notepad ++ and found this.
I do not know why the person who created this .OVF selected a IDE controller for the HDD., but here we are.
I informed my Engineer of the issue, and he said that they told him to use VMware Converter to change it into an acceptable VM image. 
Giving them the benefit of the doubt, I downloaded the lastest copy of VMware Converter Standalone (which took me a day, because VMware’s Download site was not working) and tried to convert it.
Guess what, It didn’t work!!
This is also not the first time I have run into this issue with this particular vendor (who shall remain nameless). Their .OVA files will give you the same error message.  So needless to say anytime I run into this vendor, I immediately tell my Engineers to get me an .ISO and I will build them a VM from Scratch. 
I hope you find this post helpful, and if you would like to know more information about this, please feel free to DM me on one of my social media accounts. 
Thanks for reading, and check back soon for more articles. 

I didn’t know this was even possible…. SSL Certificate weirdness

 So I was working on the post about how to resolve the SSL Certificate error message that you get if you do not have the Root certificate for the ESXi host installed on your machine. Well in the process of taking screen shots for that post I discovered something that I have never seen before.  Rather than starting from the beginning, lets pick up at the end of the last post.

So right after you finish installing the Root CA on your machine, you have closed out of your web browser and reopened it and go to the URL and you get this message.

On first glance it looks like the certificate install failed, but it didn’t, Upon closer inspection of the message you will see that there is an issue with the CN is invalid. 
For those who do not know CN means Common Name which is usually the FQDN or Host name of the server. So I went back to check the CN of the Certificate of the ESXi host and I found what you see below.  This is where things get crazy….

So according to the image above, the SAN or Subject Alternate Name (AKA a list of CN’s, usually up to 5 on one Certificate) is an IP Address!!! How the heck is it an IP address? 
So what I tried next was typing in https://172.26.96.44 in my web browser and I was immediately presented with the image below. 


So wait, it worked like it should using the IP address instead of the name. How did that certificate get issues at all.

WELL….. It would appear that one of my co-workers added this host to vCenter with the IP address instead of the name.

Needless to say I am very disappointed in my Co-Worker for not following our naming convention.  But if I had to guess it looks like VMCA (VMWare Certificate Authority) which is included in the PSC (Platform Services Controller) and issues Certificate to hosts when they are added to vCenter must have issues the certificate to the IP address because he added it using the IP. Having dealt with several different Certificate Authorities in my time, this is crazy to see. 
Anyway this is just a heads up just encase you run into something like this in your travels. 

Airwatch on a Mac 003 – The rebuild

So when it comes to the world of Mac’s and Apple products in general I tend to steer clear of them as much as possible.
In my company however we have a few Mac users and supporting them can be challenging at times. That being said and after bricking this device on my first trip around the block, I got a pretty good view of how to reload the OS from the internet. For documentation purposes I ended up bricking the Macbook again just to see if I got the same results. You can find that post here.

After the wipe completed the Macbook reboots and you are presented with this Lock Screen. This is to prevent unwanted access if the device is lost or stolen. 

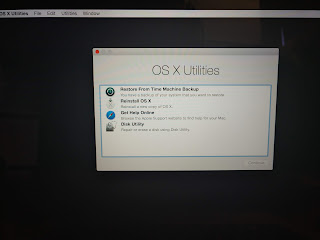
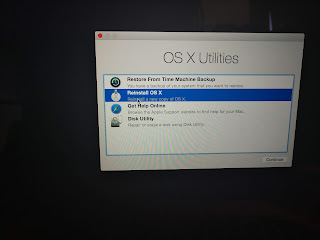
Type in the 6 digit pin number and click the arrow next to the last box to unlock the machine. You are then presented with the OS X Utilities screen.
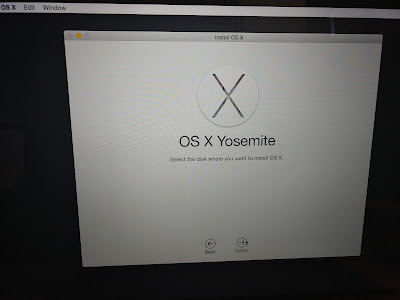
From here you have the option to restore from Time Machine Backup, Reinstall the OS, Get device help or go into disk utilities. I can tell you from personal experience, at this point if you go into reinstall OS you will find that the disk is not available as seen below. 
 you will need to Shut down the laptop, and restart it back up into recovery mode. 
  
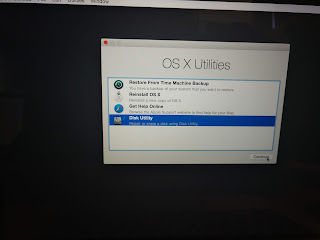
From here you will want to select disk utilities and click continue.
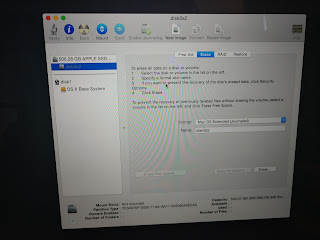
Once the Disk Utilities loads up you will see that the Drive is there and there is a volume available, however if you select the volume you cannot do anything with it. the options to inspect is are grayed out.  You will need to go to the Erase tab to continue.

On the Erase tab you have the ability to rename the volume, select the new formatting and then click Erase. After the volume has been reformatted you can then go back to the First Aid Tab.

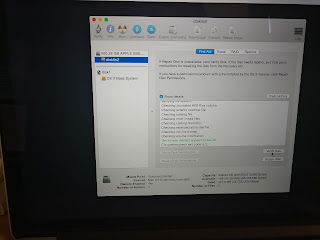
you will see that the option to verify disk has been enabled and if you run it you will see something like this.

As long as you get this then I would say you are safe to proceed. Click the close button in the upper left hand side (looks like a red circle) and this will bring you back to the OS X Utilities Screen.

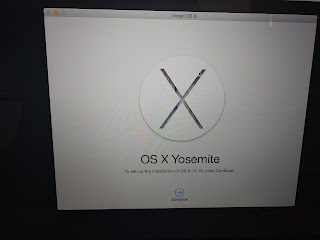
Now click on the Reinstall OS X and it will take you through the wizard to reinstall the OS. 
Click Continue

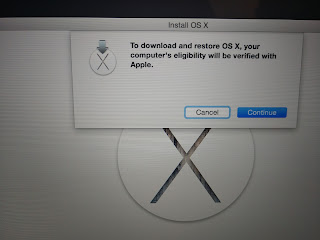
click Continue Again
Agree to the terms and conditions (does anyone read these)
Are you really sure you read them???
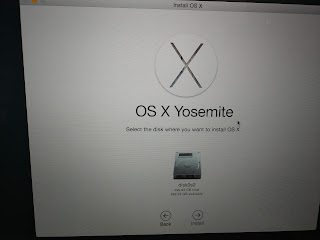
Hey look! there is a drive there now!!! Click on the image of the drive and then click Install.

I have worked in IT for more than 15 years, and I have seen all kinds imaging and deployment of operating systems but this was pretty cool.

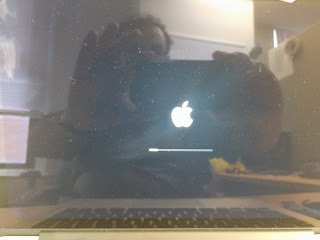
After you click install the laptop reboots with the Apple Loading Screen.

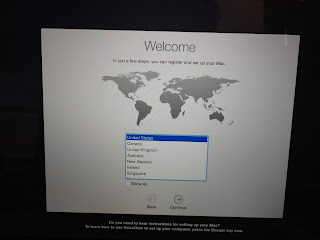
Then the OS actually gets installed, and after about 2 hours of downloading and installing we are back to the welcome screen as if it was fresh out of the box.

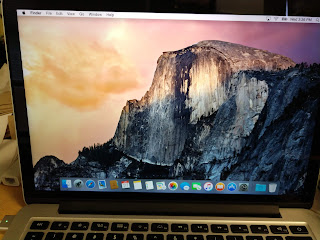
 Then after going through the setup wizard I am now back to the desktop.

I then reinstalled the Air Watch client which I will cover in a different post, connected it to my server, and it is now ready for action!

I hope you find this helpful. Please leave a comment if you do, I would love to hear from you.