Categories
Home Assistant Home Automation Z Wave

Home Assistant Build out continued… Setting up Automation

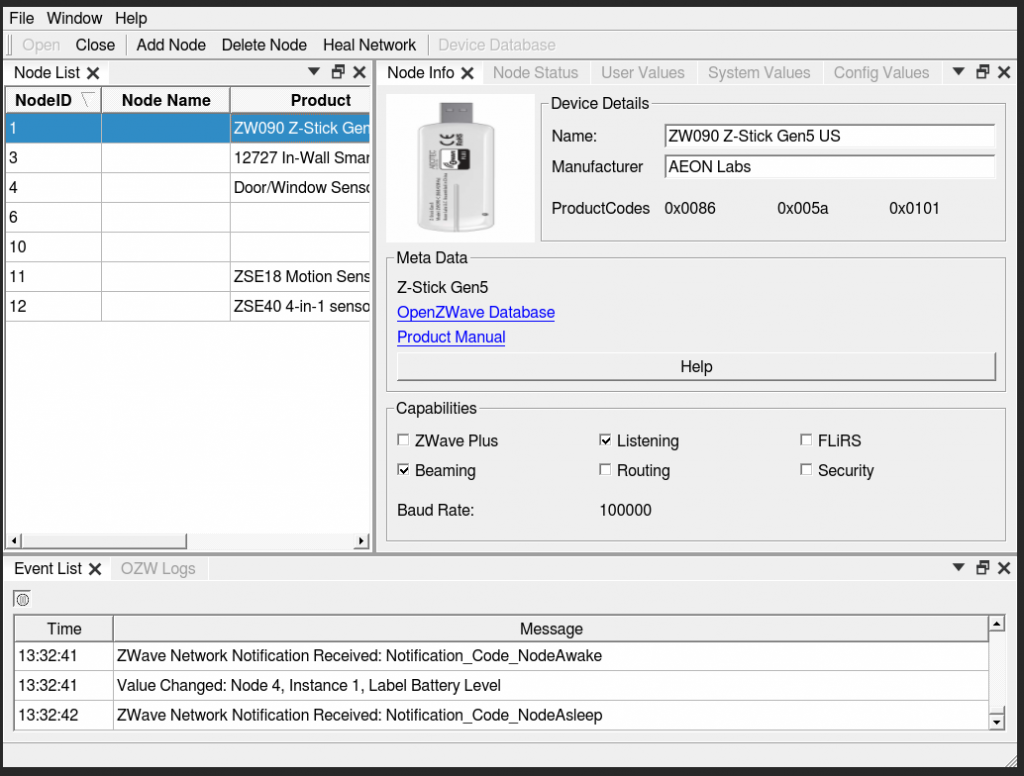
I believe we left off last time with all of my Z Wave devices finally showing up after being patient. Now it is time to setup my favorite (also the first I ever did) which is to turn on my office lights when the door opens. It’s like a surprise party every time I go into the office (Okay I stole that from Jerry Seinfeld). For this post I will do a step by step guide.

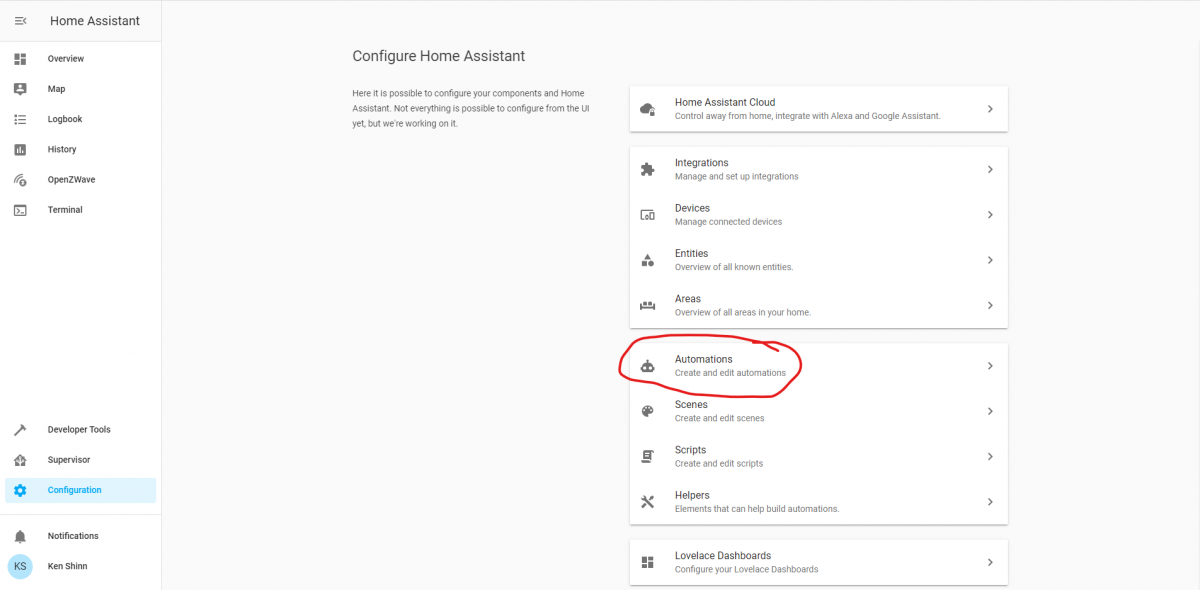
For this guide we will start from the Configuration Menu. Just an FYI there are in fact multiple ways to setup an automation with this new version of HASSIO. The way we are going to proceed is the classic way of setting it up which is Configuration Menu > Automation. However if you are the devices menu looking at a device you will actually see all the automations attached to that device. This is an awesome feature I am so excited that it is available.

Anyway, on to the guide.

From the configuration menu click Automation

On the Automation page you will be shown a mostly blank page, with a little plus icon in the lower right hand corner. Click on the icon and proceed to the to setup wizard.

Home Assistant New Rule Button
New Rule Button

Once you click on the new rule button, it launched the new Automation Wizard

New Automation Wizard

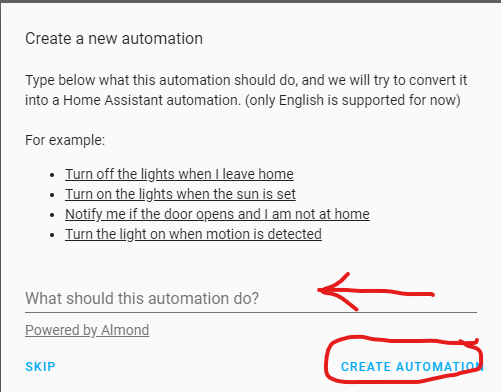
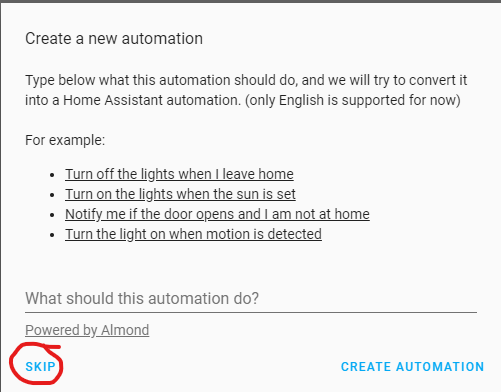
From here you can follow the wizard and type in what the automation should do and then click Create Automation and it will walk through the process of creating the wizard, or you can be like me and kick it old school and just click SKIP.

You will then be presented with the blank automation form

Blank Automation Form

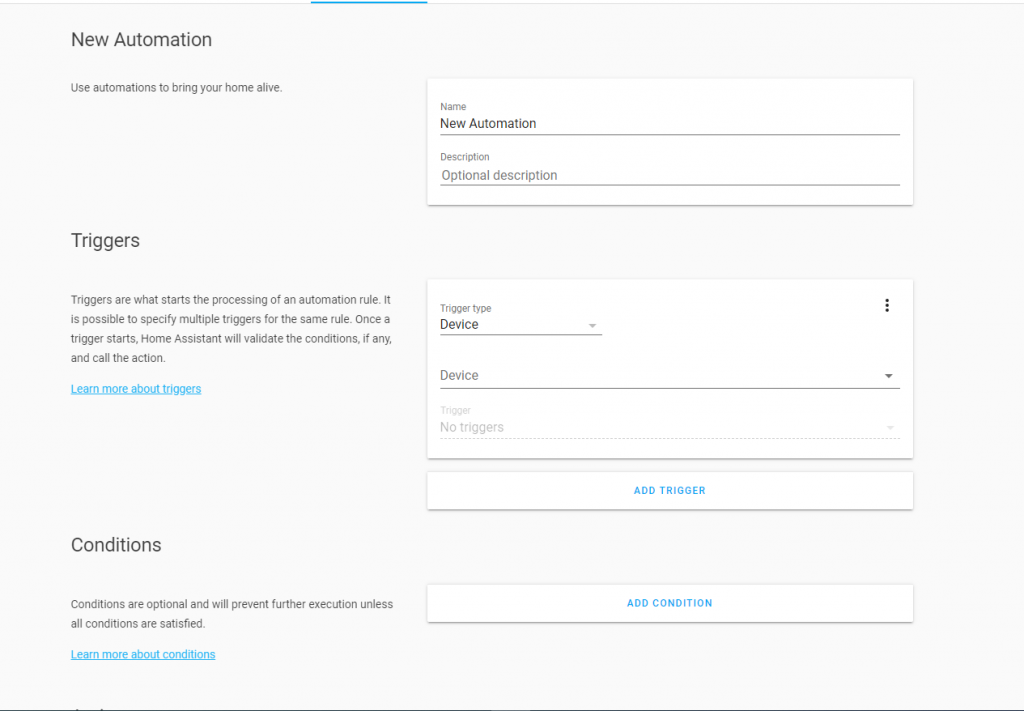
Now you will need to name your new Automation in my case I named mine Office Lights Turn On. From there you will need to move onto the Triggers section.

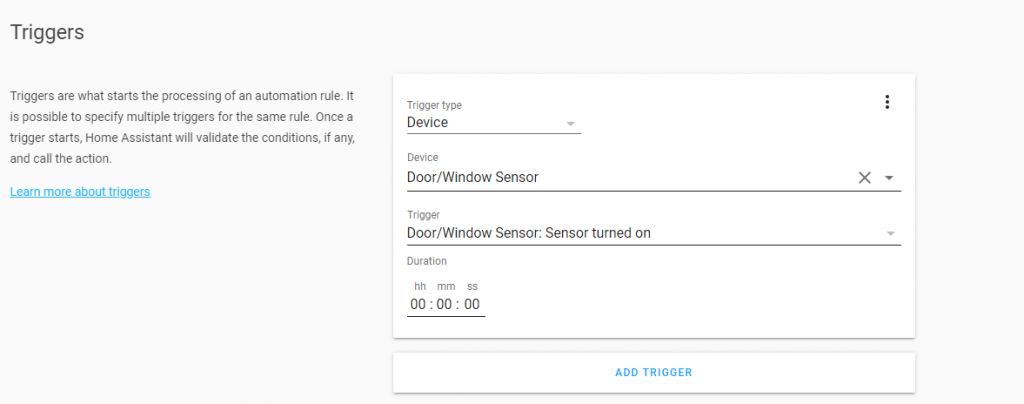
Specify the Device, in our case it is Door/Window Sensor and then what the triggering status would be. Then move down to Actions.

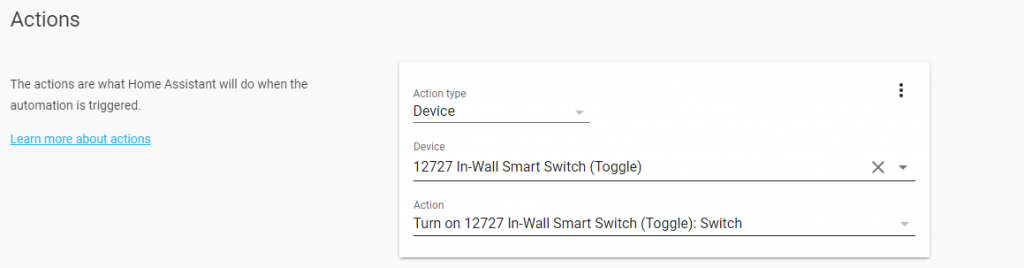
Here we will specify the device which in our case is my GE in Wall light switch and the action which will be to turn it in.

Once you are done with all the configs you will need to click the Save icon in the lower right hand corner (you might need to go looking for it).

To recap the rule we just setup will set the in wall switch to ON when the door sensor is set to on. It is really that simple, and it makes your friend and family think that you are a wizard…. well maybe not but it’s still cool.

I hope you found this guide helpful and if you did please share with your friends.

Categories
Home Assistant Home Automation Z Wave

Home Assistant / HASSOS 2020 Build out

With all that has been going on in the world I decided with all my extra free time to get back into my Home Assistant setup and do some updates. There had been many changes and updates since the last time I looked at my system and let me tell you right off the bat, my system was running great. It had been up for about a year or so since the last catastrophic failure, which in my defense was due to my SD card becoming no longer readable. Before that my Home Assistant (that’s right not HASS.io) ran for like 3 years before this happened.

So I logged into my HASS.io setup and decided to start updating…. and that is where things went wrong. I tried to install OpenZWave which caused my zStick to stop working and my APIs for my smart thermostat and IKEA TRADFRI stopped working as well.

Needless to say I had to start from scratch so I downloaded the latest version of HASS.io and turned off my Raspberry Pi. Here is what I am working with for this setup:

  • Raspberry Pi 3 B+
  • 128 GB San Disk SD Card
  • Aeotec Z-Stick Gen 5

I loaded up my setup and fired up the Pi….. then I realized I forgot to configure my static networking for HASS.io. Fiddle sticks, So I hit the power button on my USB Dongle, popped the SD card back in my PC and made the Network changes (I can create a walk through for this later, or you can RTFM on the Home Assistant Website. Then I replaced the SD card again and fired up the Pi, and after 3 hours, nada. It didn’t work. ARGH!!!!

Apparently HASSOS (the OS for HASS.io) does not like it when you pull the power out while it is attempting to download files and databases. Go figure.

So I powered off the Pi and flashed the Card again and we were off to the races. FYI, I didn’t do the network config file this time either and it worked fine…. Thanks DHCP!

Once I got to the log in screen my first order of business was to get Open Z Wave running. I went to the Supervisor section of Home Assistant and added the Open Z Wave Add-on. What I didn’t realize was the fact that I needed to install MQTT before Turning on the Open Z Wave service. I can go into details on that in a later post as well but for now just know 2 things. First, once you turn on Open Z Wave for the first time it may take 2 or 3 tries for it to actually start and stay started. Even then it will take about 2 minutes for the service to load (depending on your hard ware). 2. Even if you click start on boot, it does not start on boot.

After all of that I finally got it to load as seen here:

Open Z Wave Dashboard

If I can give any first timers or even those who are used to the older Z Wave Interface any advice, it would be to be patient. It took about 12 hours for all of my Z Wave devices to finally report in.

Currently my Z Wave Devices are as follows

  • GE Z Wave Smart Switch (Gen 1)
  • Zooz Motion Sensor
  • Zooz 4 in 1 Sensor
  • Z Wave Door Sensor
  • Wave Door Sensor
  • GE Z Wave Smart Switch (Gen 2) (Not installed yet)

I am going to end this post here, but I plan to document my build out of Home Assistant and maybe even my VMware Home Lab where I might start to run Home Assistant on a VM!.